2.17.2011

Rainbow Stuffed French Toast...I think I found the pot of Gold...

IMG_7588.stamp


Need I say more?...except maybe pass the plate!! This is brought to you by the super creative mama at i am mommy.  You will definitely want to check her out. Here is the recipe for this yummy delight.

Stuffed French Toast
1 loaf French Bread
3 Tablespoons Any Flavor Fruit Spread (You Can Also Use Jelly, Jam, Or Fresh Fruit)
½ packages Cream Cheese (4 Oz), At Room Temperature
2 whole Eggs
1 Tablespoon Cinnamon
½ cups Skim Milk
2 Tablespoons Butter
Heat skillet or electric griddle to 325 to 350 degrees.
Cut french bread into 2-3 inch wide slices. Then, with a paring knife, go back and cut halfway into each slice, in the center, creating a ‘pocket’ that your fruit mixture can be stuffed into.
In a bowl, place the room temperature cream cheese and three tablespoons of fruit spread of your choice.  Combine well.
In a separate bowl, break 2 eggs; add cinnamon and milk and combine well.
Now, take fruit mixture and stuff into the ‘pockets’ of your french bread slices. Place on a baking sheet.
When done stuffing each piece of bread, completely coat each piece in egg mixture. Make sure all sides are covered. Do all pieces before starting to fry.
Put 2 tbsp (you can use less!) of butter into a hot skillet and melt completely. Add all of the bread to the skillet and cook roughly about 3-6 minutes on each side, until it reaches a nice golden brown. You want to make sure the cream cheese mixture heats through.
When done cooking, add any additional fruit, and serve immediately with butter and syrup.

President's Day

A tip: If you google President's Day party, and anything about a tea party comes up, it's not the kind of "Tea Party" you might have been expecting.

I'll be honest, the only way I've personally celebrated President's Day before was sleeping in.  But, now that my oldest is getting a teensy bit older, I might do something after all next Monday.  Here's a few things to consider:

Family Fun has this tutorial for a "Presidential Frame" that seems pretty easy and would make a good visual if I do a little lesson on Presidents.


Another Family Fun craft is the Uncle Sam Pin, which is adorable, plus gives me an excuse to buy those little sundays that come with those short spoons!  (If you can buy them minus the ice cream, don't tell me!)


 Kaboose has a tutorial for these finger puppets, which look easy enough for my 4 year old to make! (which sound like an insult, but is just actually what I meant)


And, are you kidding me with these pillows?  So incredibly cute!  But, with the projects I have lined up right now, I don't think I'll get to it this weekend.  *sigh*  The tutorial is by Beckie at Infarrantly Creative, while guest blogging at I Am Momma - Hear Me Roar. 
In case that's confusing, let me clarify, the tutorial is at I Am Momma - Hear Me Roar, but its a guest post by a different brilliant blogger, Beckie at Infarrantly Creative.  So check it out!
Photobucket

2.15.2011

Homemade Valentine's

There may be a day where I just buy Valentine's from the grocery store, but for now (for preschool!!!) I love making them!  I saw these adorable free printables from MerMag, via Be Different, Act Normal (not gonna lie, that blog is like my own personal google reader!) and wanted to do these!


I thought it'd be fun to have L help stamp them with "Arrr you my Valentine?"

I used these delicious strawberry wafers, found at Target
 I then put them in little treat bags and sewed them closed and onto the Valentine.  She takes them for her party today!  I love how they turned out!!!


Photobucket

2.14.2011

Bow and Bow Tie

I made the kiddles matching bow and bow-tie.  Too cute for words? Yes!  Too much time on my hands? Yes!  I also made the sequin applique on L's shirt.  There are several tutorials on how to make bow-ties floating around the internet, but I used a lazy version of Prudent Baby's.  And that's already the lazy version, (sorry baby, its true!  your bow tie doesn't need to be tied!) mine involved velcro.  Let's leave it at that.  

Clothing credits: Gymboree for polka dot sweater and tights.  H&M for vest, Gap for skinny jeans.  
Photobucket

Shamrock Pin


 This happy little shamrock pin for those times when you are feeling green and need that sparkle to show it!!  We also have one with a clip for your shoes to make it Toe Glam as well!

Photobucket

Why doesn't my Husband throw a party like this for my Valentine's?


Image courtesy of Kara's Party Ideas.  You should really go check out the rest of her blog post about this party!

Photobucket

Vintage Valentine


I love vintage style, especially vintage children's illustrations!  Jack and Izzy made a super cute Valentine display with free images she found online and just printed out!  Head over to her blog and check out the rest of her cute images.  (By the way, she has an etsy shop that I absolutely love!)


Photobucket

2.13.2011

"Handmade holiday t-shirts for school are a must, Mom!"


Glitta's girls are now accustomed to having a new holiday themed shirt to wear to school for each holiday. Homemade by Mom, of course, and they won't settle for just buying a cute holiday shirt from a store!
did I mention that I have created holiday snobs?

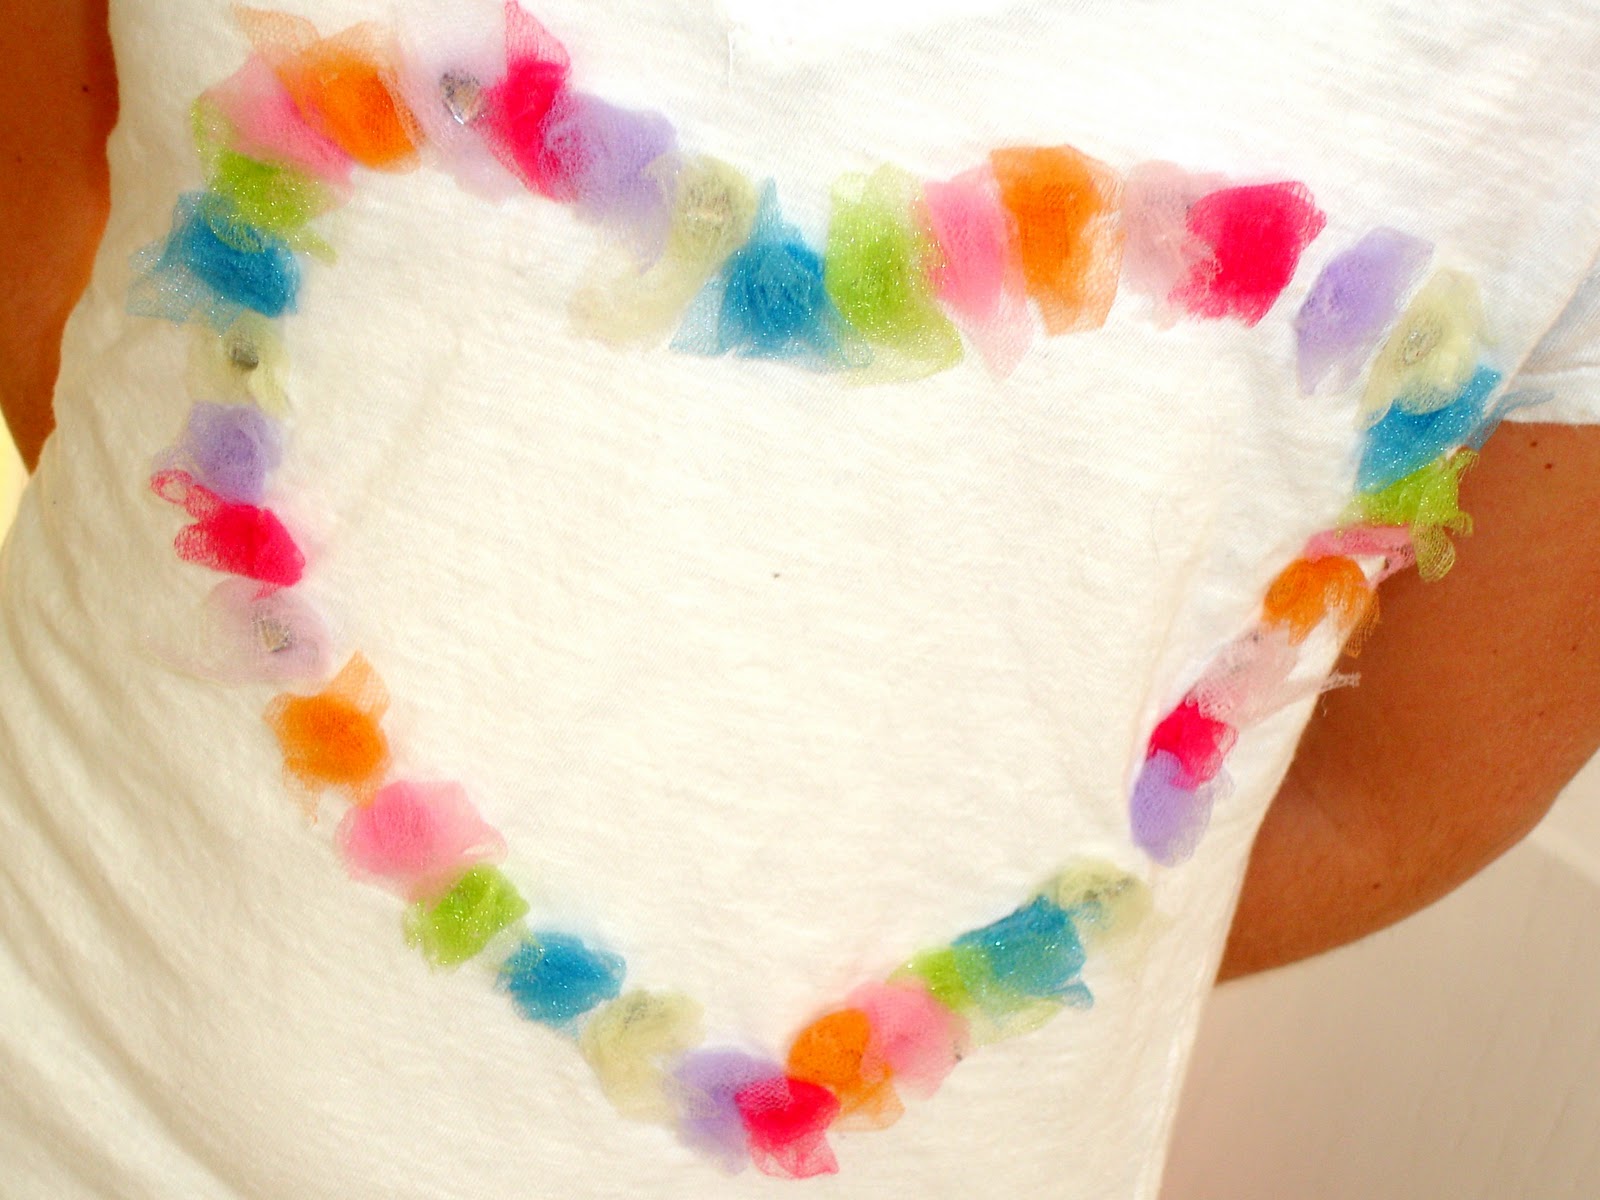
But, I love to do this for my kids and this is my tulle heart valentine's day shirt.

This is an easy tutorial for tulle heart shirts, but we don't have pictures for each step. 

Do you remember making tissue paper square projects as a kids where you would roll tissue paper squares and then glue the bottoms in different shapes to paper? That is the idea behind this shirt. You start out with 1/4 yard of the different colored tulle you want to use. Cut it into approx.  1 1/2 in squares. Trace a large heart onto a t-shirt with pencil. Lay a piece of foil underneath your shirt so the hot glue won't stick through. Then put a dot of hot glue on your shirt and twist the bottom of the tulle and with a pencil press the tulle onto the shirt and carefully attach the tulle. Follow the outline alternating colors of tulle in a pattern. Then I added small rhinestones periodically throughout the center of the tulle with hot glue. 

This shirt can be washed inside out on the gentle cycle of your machine on cold and hang to dry. 

Enjoy!

*Glitta's sister made this version of the tulle tee for her little sissies! What is not to love?
http://sz0074.ev.mail.comcast.net/service/home/~/319.JPG?auth=co&loc=en_US&id=306427&part=2

But keep in mind, if you make this adorable shirt, you may be creating
 your own little holiday snobs!  Don't say we didn't warn you!!


Photobucket

Valentine's Snobcake

http://realmomkitchen.com/wp-content/uploads/2010/02/red-velvet-cupcake-6-450.jpgOur featured cupcake of the month is brought to you by a favorite site, RealMomKitchen (you must check her out).

The Red Velvet Cupcake. 

But of course this is not just any red velvet cupcake...it is a snob cake. I will tell you why. First of all, it tastes divine. It is made with a cake mix--always a score in my book. But the frosting is what takes it to the snob level. And Laura at RealMomKitchen was genious when she put cool whip into cream cheese frosting. The coolness of keeping them in the fridge is another dirty little secret! Do make and you will be won over to this lovely little lady....our Red Velvet Cupcake.
Here is the recipe:

Red Velvet Cupcakes
1  pkg.  (2-layer size) red velvet  cake mix
1 pkg. (3.9 oz.) JELL-O Chocolate Instant Pudding
1 pkg. (8 oz.) PHILADELPHIA Cream Cheese, softened
1/2 cup (1 stick) butter or margarine, softened
1 pkg. (16 oz.) powdered sugar (about 4 cups)
1 cup thawed COOL WHIP Whipped Topping
1 square BAKER’S White Chocolate, shaved into curls (or whatever you want to go on top such as a chocolate heart or Valentine’s sprinkles)
  1. Prepare cake batter and blend dry pudding mix into batter before spooning into prepared muffin cups. Bake as directed on package for 24 cupcakes. Cool.
  2. Meanwhile, beat cream cheese and butter in large bowl with mixer until well blended. Gradually beat in sugar. Whisk in COOL WHIP. Spoon frosting into small freezer-weight resealable plastic bag; seal bag (or use a cake decorating bag with tip). Cut small corner off bottom of bag and insert tip.
  3. Frost cupcakes with frosting. Top with chocolate curls.(I tried to do chocolate curls.  I used a potato peeler on the square of Baker’s chocolate.  I ended up the more like shaved chocolate, not curls here.  You probably have to do curls the old fashioned way it you want nice curls) Keep refrigerated.
Photobucket

2.11.2011

A Snob doesn't accept a plain front door

It's not that other people's plain front doors aren't perfectly lovely, but I just see a blank canvas on mine.

Last year I bought a cheap feathery heart wreath from Big Lots just because I needed SOMETHING for my front door and it was the cutest affordable one I'd seen.  But this year it didn't seem as cute anymore.  Does that happen to you?  So I decided to pump it up a little.

First I used one of the wreaths from the dollar store and that ugly faux velvet ribbon from Christmas that I bought after Christmas:

Then I wrapped the wreath, hot-glueing as I went.  I then tied tulle around it.  I didn't take pictures of that step (I'm new to the tutorial process, forgive me!) but I used a 6-inch spool, with pieces cut into about 15" long sections.  I had actually used them to make a tutu for a birthday present and I just used what was left over.  So the tulle probably isn't as full as I'd pick.  But, you get the idea.

You can see the tulle knotted around the wreath in the picture below, but then I added a strip of burlap (about 6 inches wide, 24 inches? long) and pinned it into ruffles around the back.

I then added this little ribbon hanger with hot-glue and a pin.


I then hung it up and it was too short!  So I added the hideous faux velvet to the back.  (If it's so ugly, why am I using it???  But it's not that bad I guess...)

And, Voila!  The finished wreath, with added embellishment on the front.  Doesn't that heart light effect make you feel like you're listening to the Bee Gees at a roller skating rink or something?  Somehow that seems to fit Valentine's for me!


How deep is your love, how deep is your love
I really mean to learn
'Cause we're living in a world of fools
Breaking us down
When they all should let us be


Okay, now I'm embarrassed for myself...
Photobucket

For the Love of Shoes!


Ahhh...is there anything better than a perfect excuse to buy new shoes? I knew I had created little shoe snobs in my girls at an early age (do I dare say how young?) when they started getting excited about shoe shopping and WHICH shoes...You know exactly what I'm talking about, don't you? I knew we would love each other! But this is the whole point of snobs...it is not snobbery at all: it is creating shared bonding memories and loves with your family and friends--whether it is for the Holidays---or shoes it really doesn't matter!

Anyway, I don't think there can ever be a  bad time to buy shoes, so this project gave me the perfect excuse! The idea came from Grosgrain Fabulous, via Lorie at Be Different Act Normal.  Grosgrain has a great tutorial for making these sequin shoe clips.  We had to make a couple of changes for the little shoes-- the double heart worked just perfect, but when they were done it was so worth the shopping trip. You could be in luck...we have some of these gold shoes with the hearts available to buy.Photobucket

Glitta's No-Sew No-Cost Pillow Bench


Does that sound dreamy or what?
No- sew and No-cost? Sign me up! 

So these are just 2 old pillows that I tied 2 old sweaters around. The black one is sort of pinned in the back also--but just line it up on the bench and no one will know. Then the pins from the black pillow are clips for my girls hair--the black heart jewel is from Joann's. And they are actually just clipped right onto the sweater material (just in case my girls want to wear them to school while I am using the pillows). The red pillows pin is one of mine that I wear on my sweaters that I just thought worked with red and black color scheme and is pinned right on so it is not permanent either. Just find something you have around and pin it right on!! The red shag heart is from several years ago---sorry!!

Photobucket

Glitta's Bear Hugs....the chocolate covered kind!


For Valentine's teacher gifts this year I am making chocolate covered cinnamon bears and giving them "Bear Hugs"! Everyone likes a hug, but everything is better when its covered in chocolate.  They are super easy to make and cheap!! I bought a 5 lb bag of cinnamon bears at Kings Soopers or Walmart for $3.99--wowza that is a lot of bears.

But don't just stop at giving these bear hugs for Valentine's day. I like to put one bear hug in my kids lunch--just because what kid can't use a bear hug at school!! They make fun teacher appreciation gifts or mother's day gifts.

Here is the recipe:
11 oz bag of milk chocolate chips--I prefer ghiradelli's
1/4 cup shortening
melt in microwave for 2-3 minutes on 50% power stirring occasionally
Then dip each bear halfway in the chocolate and let dry on parchment paper and put in fridge to harden the chocolate.
*I have also used milk chocolate melting disks (like Wilson's brand from Walmart or Joann's) and follow the same directions, except you don't need to put in fridge.


Now here is the best thing about looking at these little cuties, you can really just look at them here and then feel like you are eating them up....and according to a show I watched on PBS (a little weird that I watched a show on PBS I know) that was talking about the future of avatars and online world (which is really quite creepy to me but I liked this part of it) research has showed that people who experienced eating online actually felt full in real life and the pleasure of eating etc.. as an avatar carried over to real life----hmm..... Dot said something about pretending to eat a cupcake and not having any calories from it...well Dot you are so validated now by PBS! So maybe if you stare at the pictures of these chocolate covered cinnamon bears long enough you will feel like you actually ate them too! And then they are calorie free and cute and if that's not a win-win, I don't know what is!

P.S. Guilty confession from Dot:  Glitta brought me that cute little plate 
of Bear Hugs and I've finished them all while working on blog posts
 tonight.  Sad for me, but it should tell you how scrumptious they are!

Photobucket

2.10.2011

Conversation with a Cupcake


It wasn't original, but the creation was still satisfying.  I like a pretty cupcake.
Photobucket
Related Posts Plugin for WordPress, Blogger...